

Part 2: Polishing and Waxing
Once you’ve gotten the vehicle clean, you may want to take it a step further to really protect the finish as well as make it look fantastic. I perform this procedure at least once a year on all my vehicles to keep the paint in the best possible condition. If you’re going to set aside time to polish and wax your vehicle, I’d recommend giving it the best possible base for the wax to “stick” to. By this I mean washing the vehicle with dishwashing detergent like Lemon Joy. This removes any old wax which is especially important if switching wax brands and gives the wax a nice fresh surface to mate to which extends the life of the wax. The only time you should wash your vehicle with dishwashing detergent is when you intend to re-wax the vehicle immediately after as it strips wax from the paint surface leaving it unprotected.
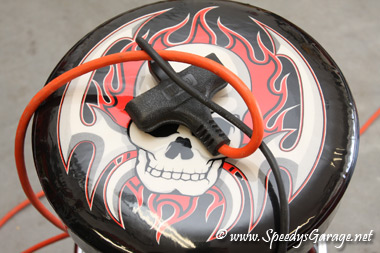
I recommend using a random orbital to polish and wax your vehicle. I’m emphasizing random orbital so that it’s not confused with one of the high speed direct drive orbitals body shops use. The high speed type induce a lot of friction and heat to the vehicle surface and can quickly burn through the finish. With a random orbital there is virtually no chance of that happening as they move at a much lower RPM and oscillate as they spin. I use a Porter-Cable model 7336 random orbital machine. This model has a variable speed switch and is plenty robust for years of service. You will need a 6” hook and loop pad holder for the Porter-Cable random orbital in order to attach the polishing and waxing pads. Griot’s Garage has a nice random orbital as well, which may be a better deal and will come with the proper hook and loop back plate, so check both before purchasing to make sure you get the best deal. One other quick tip, tie your extension cord and orbital plug together. This will avoid the orbital coming unplugged as you move around the vehicle. Also, be careful around rubber trim and emblems. I stop about 1/4" before any trim or emblems to avoid getting polish and wax on them. If you're more prone to be messy, use painter's tape to cover up these areas.
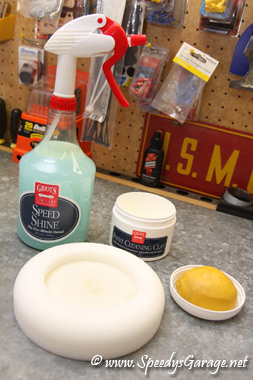
Step 1: Clay the vehicle. You can run your finger tips over your paint and feel the contaminants. After claying a vehicle, it’ll feel very smooth. I have found Griot’s Garage Paint Cleaning Clay and Speed Shine to be a great combination for this job. As with washing the vehicle, I use Griot’s Garage products due to their quality and ease of use. Speed Shine makes a perfect detailing spray as well so you get two products in one.
Claying a vehicle is simple. Make sure the vehicle is in a shaded area and cool to the touch, mist Speed Shine on the paint surface and simply rub the surface with the clay then wipe the area with a microfiber towel. After doing a small area, fold the clay over a couple of times and continue to another section until the whole car is clayed. You can run your fingertips over a clayed area and feel a dramatic difference in the paint finish.
If you want to make the job even easier, pick up one of Griot’s Garage Clay Pads. This allows you to use your random orbital to clay the car which cuts the effort and time in half and will do a much better job than you can by hand. Saturate the clay holder pad with Speed Shine as well as the clay itself and mold the clay into the holder area. Be sure to keep the holder area saturated with Speed Shine so the clay doesn’t stick. After doing a body panel such as the hood, I remove the clay, fold it over a time or two, and reapply Speed Shine to both the holder and the clay before continuing. You can also use Speed Shine on your hands to keep the clay from sticking to them as well. If you don’t have an orbital, which I HIGHLY recommend, Griot’s also offers an adjustable pad holder to make it easier to do by hand. As a safety measure I lay a clean bed sheet on the ground directly under the panel I’m working on. In the event I drop the clay, which does happen since it’s lubricated, it falls safely on the sheet rather than the concrete where it can pick up debris and scratch the paint. Finally, never turn the machine on before you have it placed against the vehicle, nor remove it from the vehicle while it’s still on. Doing so can shoot the clay across the room with a pretty decent amount of force. If claying with a random orbital set your speed wheel to “3”. When finished claying, store the clay in the original container and spray it down with Speed Shine before storing.
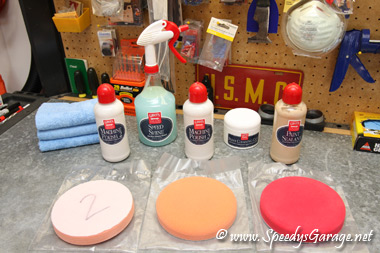
Step 2: Polish the vehicle. Polish is different from wax. Polishes have small microscopic abrasives in them to help remove scratches and swirls. In order to do this very very small amounts of the paint finish are removed, but the amounts removed are undetectable with normal polishes, so there’s no worry of damaging the finish. Griot’s Garage makes a very specific system for polishing a vehicle. Their polishes are numbered 1 through 4 with one being the strongest and 4 being the most mild. The polishes should be used in order, for instance if you use 2, then you should use 3 before waxing. If you use 1, then you should use 2 then 3 before waxing. Polish number 4 is very mild, and I’ve not used it as number 3 gets the surface plenty smooth for me. I’ve never used polish number 1 either as I’ve not had scratches bad enough to warrant it, but it’s good to know it’s there if I ever need it. On my daily driver, I start with number 2, then go to number 3, and finally apply the wax. This has worked out very well. On a brand new vehicle, polish number 4 would easily do the trick.
Griot’s Garage polishes are designed for use with random orbital machines. Their microscopic abrasives slowly break down as the product is massaged into the vehicle’s surface, getting finer as you work. Griot’s makes a special orange polish pad specifically for use with their machine polishes as well as polishing kits to get you started. The polishes will wash out of the pads with warm water; however, I number the backs of my pads so that I always use the same pad with the same polish number.
Attach an orange polishing pad to the orbital backing plate. You should probably start with Machine Polish “3” and only move to stronger polish such as “2” or “1” if needed. Paint finishes have different levels of hardness and starting with Machine Polish “3” is the safest bet. If Machine Polish “3” removes your swirl marks or scratches you’re good to go.
Apply the polish in a pinwheel fashion starting from the center and moving to about an inch from the outside edge of the orange pad. A little goes a long way with the polish so don’t over do it. Place the pad against the vehicles surface, set the speed wheel to setting “2”, and turn on the machine. Ease the speed wheel up to setting “5” and start polishing. Move in no more than two foot by two foot areas going back and forth like you’re in a box, over, down, then back over horizontally, then up, over, and down vertically. Move the orbital so that the pad spins one revolution every one to two seconds. You don’t have to bear down on the machine, just let the weight of the machine do the work and simply guide it over the surface. Once you’ve completed a two foot by two foot area and the polish has almost disappeared, turn the machine off and buff the area with a microfiber towel. Try to buff the polish off while it’s still damp as it’ll be much easier. Always turn the machine on and off while it’s on the vehicle’s surface to avoid flinging polish, or the orange pad, all over the place. Once you’ve finished the vehicle, rinse the orange pad with warm water and let it thoroughly dry before storage in a heavy duty zip lock bag.
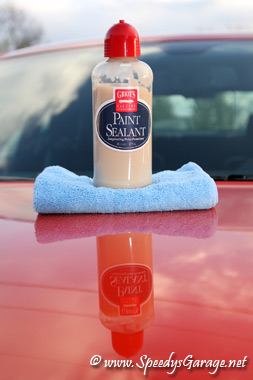
Step 3: Wax the vehicle. With the vehicle clayed and polished, now you’re ready to protect it. Griot’s actually offers three separate products for this step depending on what type of life your vehicle leads. For a garaged babied vehicle they offer a Best of Show Wax. This product lasts three to four months but provides the deepest gloss. I personally would rather drive my car than spend a lot of time waxing it so I choose their Paint Sealant. Griot’s Paint Sealant still provides a very nice deep gloss, but it lasts around a year. They’ve also introduced One-Step Sealant, which is their Paint Sealant product with Machine Polish “3” added. This allows you to polish and wax the vehicle at the same time which is a real time saver. Any of these products may be used by hand, but again I’d recommend using a random orbital for the application. The random orbital method will require less effort while giving better results compared to applying by hand. For the Best of Show Wax and Paint Sealant use Griot’s red wax pad on your random orbital. For the One-Step Sealant use their orange polishing pad.
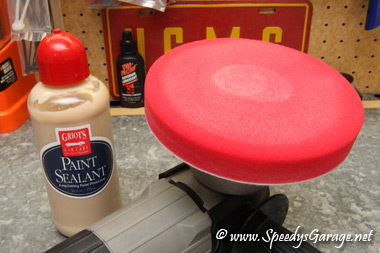
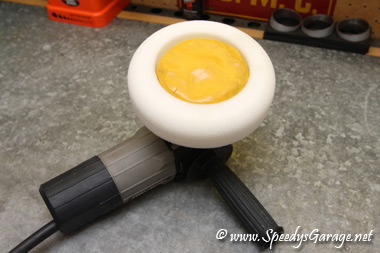
Since I use the Paint Sealant, that’s what I’ll discuss, but the Best of Show Wax is similar. Apply a small amount to the center of the red wax pad, about the size of a quarter. I press the tip of the Paint Sealant into the pad so that the product is slightly loaded into the pad. I’m going to stress again that a little goes a long way, so don’t use much. Just enough to slightly change the color of the pad in the quarter size area. Make sure the vehicle is in the shade and cool to the touch.
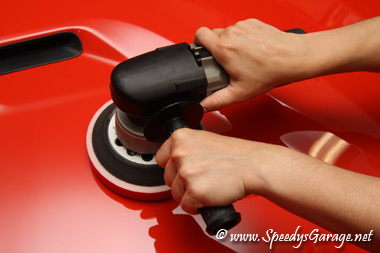
Place the orbital on the vehicle and turn it on setting the speed wheel to “4”. Move back and forth horizontally, then up and down vertically in small two foot by two foot areas like you did with the polish. You don’t have to bear down on the machine, just let the weight of the machine do the work. The pad should turn at an RPM of about one revolution every two seconds. Once the Paint Sealant has almost disappeared into the surface of the area you’re working on, turn the machine off then lift it from the surface. Use a microfiber towel to buff off the area once it’s hazed. Buffing should take very little effort. If the product is difficult to remove you’re using too much. If you have trouble buffing an area because of too much product being applied, simply spray it with Speed Shine and buff it away.
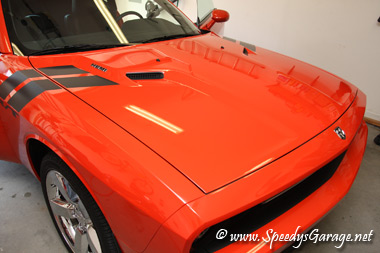
When waxing a vehicle I start with the hood and apply the Paint Sealant to one half, then the other. After the second half is waxed, I buff the first half, then the other. I work in this fashion all the way down the car working one section at a time such as the front fender, then the door. Be careful to not get the Paint Sealant or Best of Show Wax on rubber moldings or plastic trim pieces. If you do get some on trim pieces, quickly wipe it away. If you find later that some has dried on a trim piece or rubber molding, Griot’s offers a Wax Remover to take care of it. Obviously some areas you will need to apply by hand, simply remove the red wax pad from the machine and work by hand for those areas. If you’re really anal, apply some Paint Sealant to the door jambs and inner door areas. This will make them easier to clean down the road.
Now that the exterior of the car looks awesome, we need to move on to the interior.