
Counter Measures
The Challenger attracts A LOT of attention. It's bright orange, loud, and looks like it's going 100MPH sitting still. I'm not known for agressive street driving, but this car does make it exceptionally easy to exceed the speed limit before you even realize it with it's brute force torque and smooth ride. I decided I'd better setup some counter measures to let me know when local law enforcement had radar and laser running in the viscinity.
After doing some research, it came down to the Valentine One or the Escort 8500 X50. In the end I decided to keep a few bucks in my pocket and go with the Escort 8500 X50. It did exceptional in tests, had nice aesthetics, and the price was right. There are newer Escort models available, but they incorporate GPS and that costs a pretty penny and isn't something I feel is really needed. The GPS benefit is that you can program in the location of speed cameras or red light cameras. I don't plan on running any red lights as that's just asking for trouble, and no speed cameras are used in my area, so the 8500 X50 fit the bill perfectly.
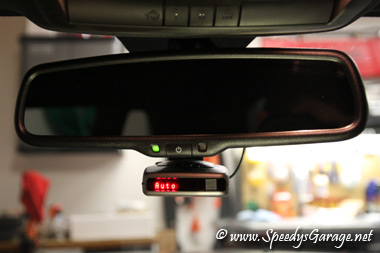
I wanted a nice clean install for this unit. After looking around on the net at available options, and talking to a few buddies, I decided on a Blendmount. This provided a very clean install and came with everything needed for installation all the way down to the allen wrenches for the adjustment screws. I was very impressed with the unit and highly recommend it. The quality of the mount as well as the multitude of adjustments make it an excellent choice for radar detector installation. It has a very nice black anodized finish that makes it just blend in, no pun intended, with the surrounding rear view mirror area.
I hate cables running all over the dash, so I always hardwire my gadgets in a vehicle. This Challenger has an auto dim rear view mirror meaning it's powered, so I tapped into that power source to get +12V to the Escort. I'll show you how to build your own power cable on the cheap.
For this modification you'll need:
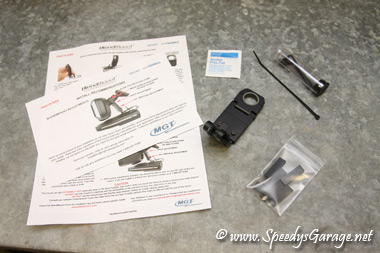
Radar detector
Blendmount
Modem or phone line
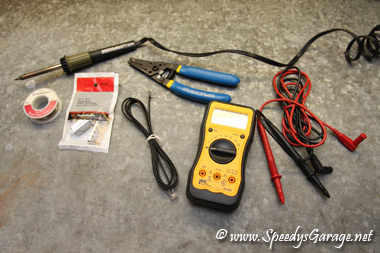
Wire stripper
Soldering iron and lead free solder
Zip ties
Multi meter
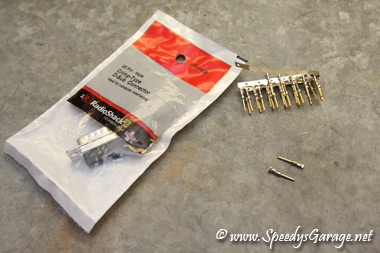
D-sub connector (Radio Shack P/N 276-1429 )
Small heat shrink tubing
Difficulty Rating: 

Like I said, the Blenmount comes with everything you need. Start by attaching it to your rear view mirror. It's attached to the rear view mirror stem using two allen head screws. Start one screw loosely so the collar can swivel then slide it over the rear view mirror stem and attach the other screw. Just set it loose for now. The mount comes with rubber pads for the collar, but those are not used on the Challenger's stem due to it's size. The instructions are excellent, so just follow them and you'll be good to go.
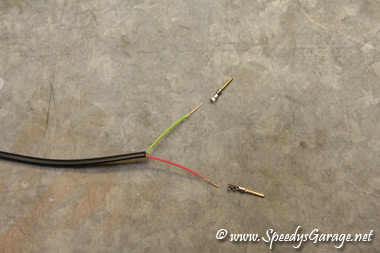
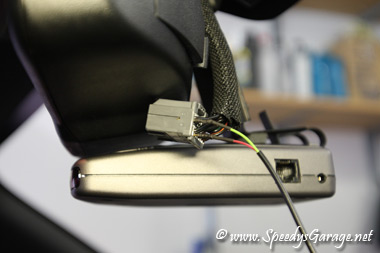
Next we want to make our power cable out of the modem/phone line. If you don't have an auto dimming rear view mirror, you'll have to draw power from the map lights or some other ignition switched +12V source. For those of us with auto dimming mirrors this makes powering the radar detector a piece of cake. The two wires you're interested in are the green and the red in the phone cable. The green will be the ground and the red will be the +12V. Cut off the phone line about seven inches from the connector. Strip off about 1" of the rubber sheath to get to the red and green wires. If using a modem cable there will only be red and green. If using a phone line there'll be other wires that you can just clip off short.
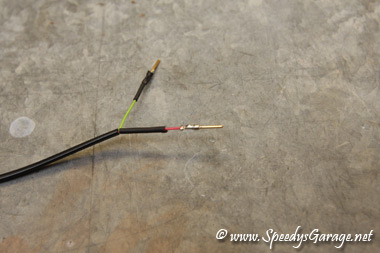
Next strip off about .25" of the sheath of the red and green wires. Now open up your d-sub connector and take out two of the pins and solder the red wire to one pin and the green wire to the other. This is VERY easy, but proper soldering technique should be applied. You always heat the wire, not the solder. So touch the soldering iron to the pin for 10 seconds or so, then touch the solder to the pin where the wire makes contact. This will cause the solder to flow into the wire and pin effectively connecting them. Once soldered just pinch the little arms on the pin together for a secure connection. Finally slide a small piece of heat shrink over the connection and lightly heat it with a lighter until it shrinks.
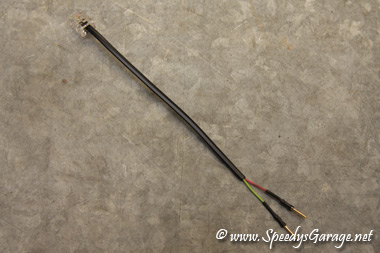
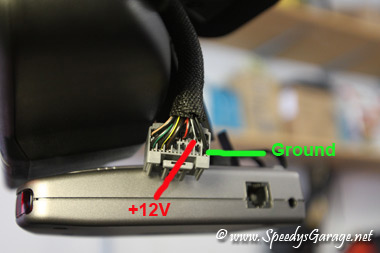
Now we just need to figure out which connections in the reiw vear mirror connector are switched +12V and ground. Using your multi meter, test the pins to find out which ones give you +12V when the ignition is switched on and no volts when it's switched off and make a note of that pin. Next find out which pin gives you ground with the ignition switched on and off and note it as well. Now simply slide the red pin into the +12V switched on the rear view mirror connector, and the green pin into the ground. These small d-sub pins will allow the power cable to simply piggy back off the stock connector with no modifications. The pins will just slide right in with a little convincing.
On the Challenger's rear view mirror +12V switched power is the black with white stripe wire and the ground is the black wire. Double check yours with a multi meter to be sure they match what I've shown.
Now if you don't have the soldering skills or aren't comfortable building this cable yourself, the guys at Blendmount have you covered as they sell a pre-made cable for this purpose.
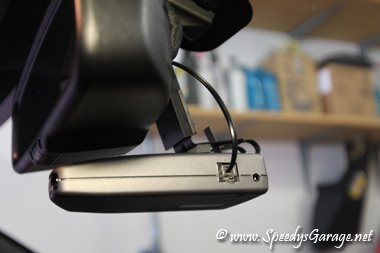
Finally, attach your radar detector to the mount and adjust it so that it faces front to back center of the vehicle, is level side to side as well as front to back. I'm anal, so I actually put a bubble level on mine to get it perfect. Once everythign is set up like you want it, put a zip tie around the radar detector power cable attaching it to the rear view mirror's cable.
What you end up with is a very clean and functionlal setup. The Blendmount gives you a nice firm installation with no movement or vibration while driving, makes for an easy to view installation location, and the quality and attention to detail of the unit really impressed me.