Mopar CAI fabbed to fit the Magnuson Blower
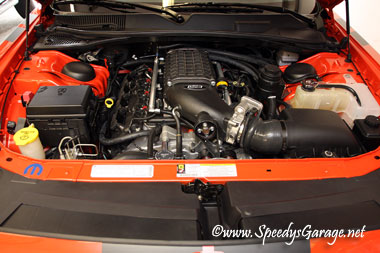
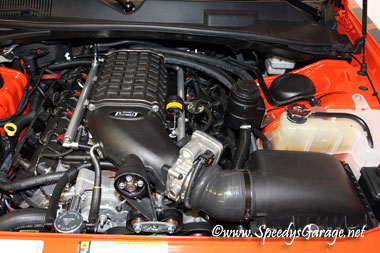
When having Project Orange Krush's power plant put together at Arrington, two other guys were there with me getting the same engine and supercharger combo. One of those gentleman opted to go for the Cervini hood as part of his package which included a cold air intake attached to the supercharger. The Magnuson supercharger is designed to work with the stock air box by default. The car with the CAI made an extra 28RWHP over mine with the stock air box and K&N drop in filter. This told me the supercharger would love some more air. Add to that the fact that I think the stock air box looks very blah under the hood and I just had to do something to correct it and pick up a few ponies in the process. At the time of this writing Magnuson doesn't offer a CAI option with their blower so I decided to fab up my Mopar CAI to fit.
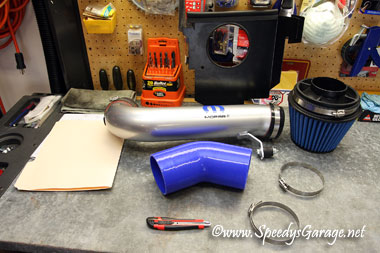
For this modification you'll need:
Mopar Cold Air Intake
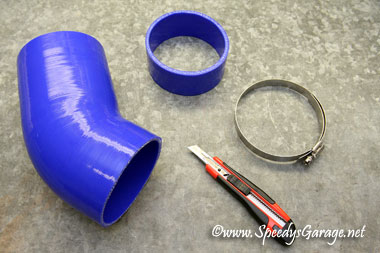
45° silicone elbow 3.5" I.D.
SHARP razor knife
Band saw or access to one
Tape measure
Cardboard
Tape
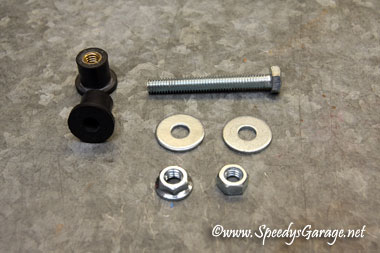
*2.5" x 5/16 -18 bolt
*5/16 -18 serated lock nut
*5/16 -18 nut
*5/16 washers x 3
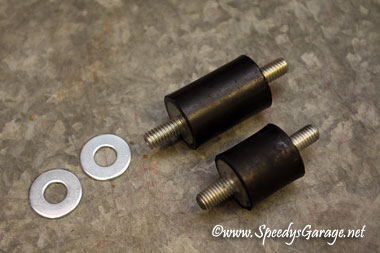
*5/16 -18 rubber expansion nut x 2
1.5" rubber isolator (optional in place of hardware listed above with *)
5/16 -18 serated lock nut x 2 (optional in place of hardware listed above with *)
5/16 washer x 4 (optional in place of hardware listed above with *)
1 foot of 5/16 fuel hose
One 3/8" to 5/16" hose adapter
Difficulty Rating: 

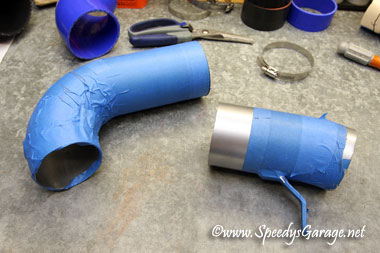
This is actually pretty easy to do. The hardest part is fitment since the tube has a bend in it at the end to properly position the filter away from the power steering reservoir. I used a piece of card board to make a tube for a template so I'd know how much to cut off the Mopar CAI tube. You want to get this right, so quadruple check before you cut as I'm sure it would be quite difficult to replace the tube. I wrapped my tube in painter's tape to protect it from scratches while I worked with it. I ended up cutting so that the Mopar CAI tube was right about 6.5" long.
As a tip, it's easier to fit the filter element in place if you lift the power steering reservoir out of the way. There's a small plastic tab on the coolant reservoir that allows the power steering reservoir to be lifted out and set aside. MAKE SURE the top is on securely and there are no leaks as power steering fluid can remove paint!
I ended up trimming a couple of inches from the end of the 45° silicone elbow to allow for proper fitment. You'll need to be careful how much you cut from each end as the angle is affected by how the cuts are made. To properly cut a silicone adapter and have it look professional there's an easy trick to use. Simply place one of the hose clamps around the silicone elbow where you wish the cut to be made. Then using a VERY SHARP blade make the cut by sliding the blade along the hose clamp. This will provide a precise clean cut. I ended up using the excess as the adapter for the filter so that the silicone connectors matched at each end.

Once you're happy with the fitment, and be sure to double check where the angled brace coming off the tube will end up, mark the tube and using a band saw make the necessary cut.
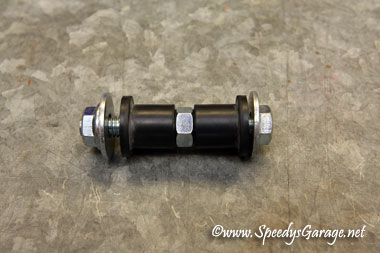
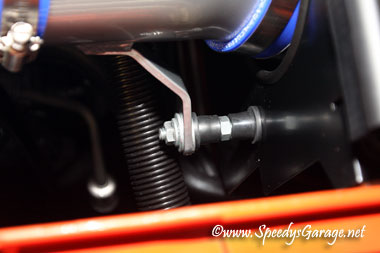
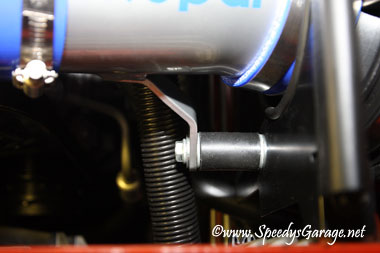
The reason I mention the angled brace coming off the tube is that it's important for that to fall in the same area as it did originally. Due to the cutting involved it will likey be just a hair short to fit the original rubber isolater, so you'll need to use the hardware I listed above to attach the arm to the heatshield where the rubber isolater used to be. This hardware can be picked up at just about any good hardware store for under $7, or alternatively you can locate a longer rubber isolater. I originally used the hardware solution until I found a new longer rubber isolator. You'll have to call some various rubber companies using Google to find one as most companes that make these items only sell them in large quantity. I was lucky, and asked nicely and talked one company in to sending me a sample so I can't give a definitive source for this rubber isolator, but they show up pretty readily on google. The hardware I listed works just as well. The pictures below show both mounting methods implemented. The rubber isolater has 5/16 -18 thread that's 5/8" long at each end and a 1.5" rubber isolater section. This with a couple of 5/16 washers fit perfectly.
Once installed you'll need to connect up the 3/8" breather hose that was connected to the stock air box. The barb on the Mopar CAI is 5/16, but the hose coming from the Magnuson is 3/8". So you'll need about one foot of 5/16" fuel line and a 3/8" to 5/16" hose adapter to connect the two sizes of hose together. Piece of cake.
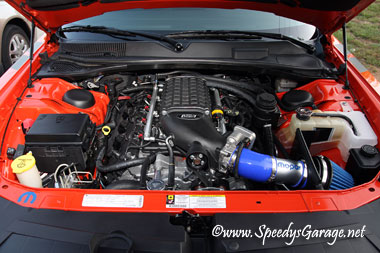
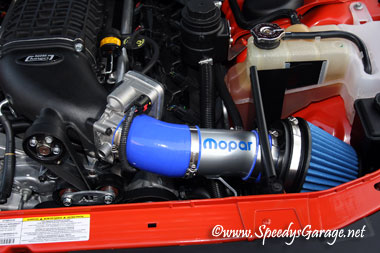
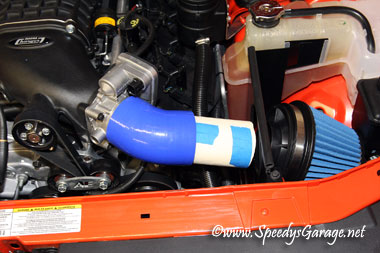
Finally, to finish everything off I had some Mopar vinyl decals made up at a local sign shop to give it a professional OEM appearance. This was VERY easy to do, and a great upgrade to the Magnuson system. It worked out good for me since I already had the Mopar CAI on hand and was able to recycle it. I think it looks great and the Magnuson obviously liked the extra air as my Air Fuel Ratio leaned out by about .5 to .6 which was more than I expected. That prompted me to send a log file to my tuner for a tune revision. More air + more fuel = MO POWAH! I'd expect a gain of around 20RWHP based on what I saw on my buddies car with a similar setup.
Here are a few before and after images. I'm sure you'll agree this looks much better and I know it performs better as well.