|
|
|
CBR 1000RR HRC
1/6 Throttle
(Viewer Submitted: Aaron aka
aarona1000rr on
www.1000rr.net)
November 2006
(Speedy Note: Photography and text were submitted by website viewer aarona1000rr. Got an article you'd like to submit? Contact me for details.)
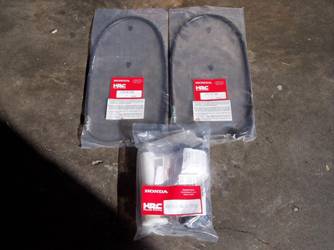
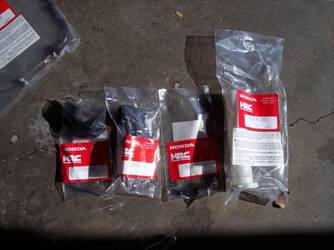
Here is the HRC Throttle Kit
|
|
|
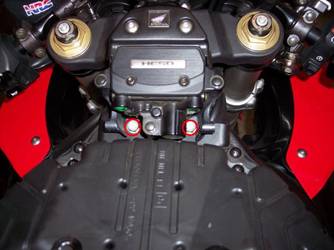
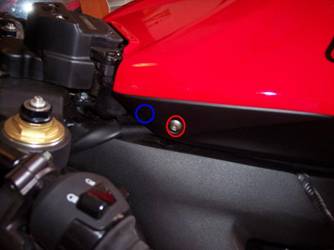
Remove the seat by unbolting the two 5.5mm allen-head screws circled in red:
Remove the tank cover by unscrewing the six allen-head screws, there are 2 under the seat (not shown), 2 more at the front of the tank cover (shown in red, take the black plastic off), which reveals 2 more screws (shown in blue).
In order to rotate the tank up and out of the way there is one screw on each side you must remove, shown in red. DO NOT remove the screws shown in blue. I held the tank up with some wire tied to metal battery protector plate.

To remove the airbox cover there are quite a few screws to remove. The screws circled in red hold the airbox on. The bolts circled in blue are the 8mm hex head bolts for the fuel hose. Have some rags handy when pulling the hose off, there is a lot of gas still in the fuel rail and in the hose. The screw circled in green holds a wire. The entire airbox assembly can then be spun out of the way exposing the air filters and velocity stacks. The airbox cover was set on the back of a chair during my installation. This was easier than removing the fuel rail and injectors.

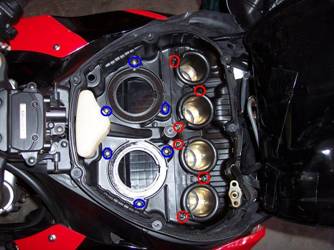
Remove the air filters. Next the bottom of the airbox needs to be removed. This is accomplished by unscrewing the six philips head screws (shown in blue) and the 6 philips head screws for the velocity stacks (shown in red). Be VERY careful with the velocity stack screws, they are super soft and are very tight. I stripped 2 of them during this installation. Also be very careful not to drop any of these screws down the throttle bodies or in the intake.
|
|
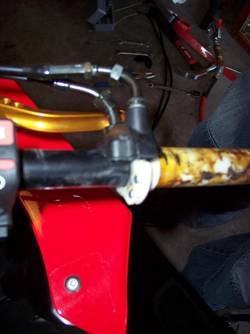
Loosen the 10mm nuts on the end of the throttle cables (shown in red) and remove the cables from the bracket. This will give you some play to get the cables off of the throttle grip.
Remove the bar end off of the throttle side and remove the grip. An air compressor was used for this removal. If there isn’t one on hand, it might be time to get some new grips anyway. Remove the 2 screws holding the grip on (shown in red). Slide the grip assembly off and loosen/remove the 14mm hex nuts off of the throttle cable (shown in blue).
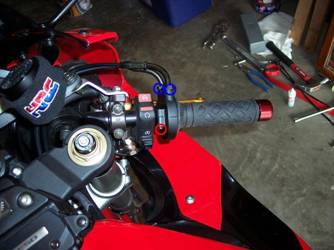
Should look like this:
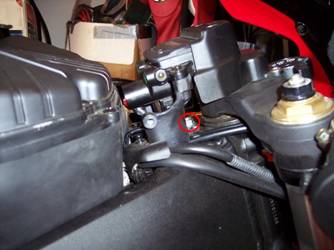
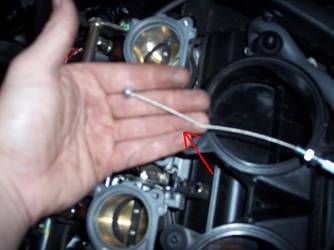
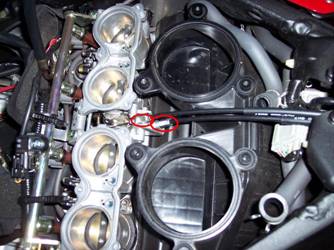
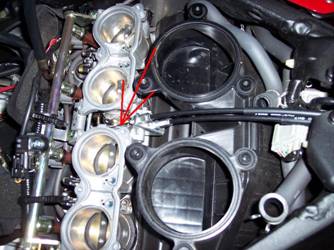
Give yourself some slack on the cables and remove them from the white plastic grip. Now remove the other end of the cables from the throttle bodies. I used a coat-hanger that I bent a little to get the lower cable off. To get the cables out from under the HESD you will have to loosen (not remove) 3 bolts shown here:
|
|
|
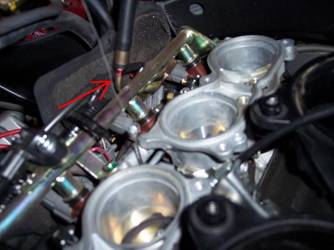
Run the new lower throttle body cable (the one with 2 silver nuts at the end) from the front of the bike, under the HESD and to the throttle bodies. If you have some long, skinny needle-nose pliers, use them to feed and pull the cable up under the throttle body pulley. I had 2 pair of pliers, the skinny one wasn’t long enough and the long one wasn’t skinny enough. So I fed a piece of wire from the rear of the pulley down and around the pulley, then attached it to the cable. I was then able to pull the cable up the rear side of the pulley and use the needle-nose to get the plug into the lower hole.
|
|
|
Once you have the lower cable attached, run the upper throttle body cable under the HESD and use the needle-nose pliers to insert the plug into the upper hole. Do not secure the cables to the bracket at this time.
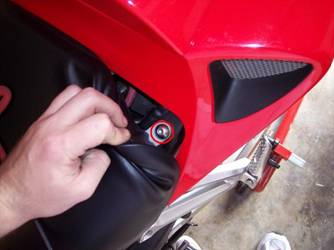
Slide the new white throttle grip onto the clip-on. Screw the new throttle grip casing onto the new cable. This cable is the lower throttle body cable, it has the non-movable threads on it. Insert the other cable into the lower hole of the throttle casing and rotate the nut to attach it to the casing. Attach the casing to the white grip. Insert the cable plugs into the holes on the white grip. Now secure the cables at the throttle body to the bracket. Rotate the grip and watch to see the throttle bodies open and close. Check the pulley and make sure the stop screw hits the stop plate (see arrow). Adjust the cable nuts at the throttle body or at the grip if necessary to ensure flawless operation. Attach underside of casing and bolt down with new screws that came in the package.
Now put everything back together!!
Have questions, ask Aaron.
This page is part of a frame set. If you reached this page via a search engine please click here to go to the main page.