 |
 |
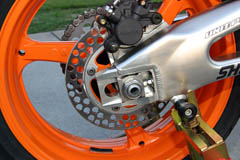
Honda CBR 1000RR Lightened Rear Rotor
March 2006
After seeing this modification over at Rogue Racing, I had to give it a try. I was having a set of fresh Michelin Pilot Powers put on and figured that was as good a time as any to have the rear brake rotor modified. You have to know what you're doing or you risk warping the disc, so don't just grab a drill press and go to work on your own. Also, the holes will have to be chamfered to avoid gouging the brake pads. I sent my rotor off to Tom Wertman who charges $38.00 US to perform this work. This $38.00 includes shipping the rotor back to your address making this modification very cost effective. Tom completed the work on my rotor and I had it back in my hands in just a few days.
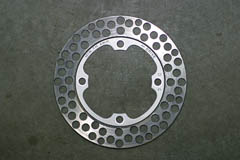
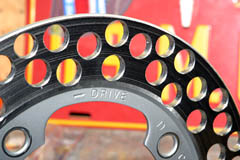
This modification has several advantages. It lightened my rear rotor by 0.48 lbs (0.22 Kg). You're less likely to lock the rear wheel during rear brake application, however the rear brake still works very well. You can still lock up the rear it just takes more to do so. The modified rotor also looks very trick on the bike and is much less expensive than a wave rotor.
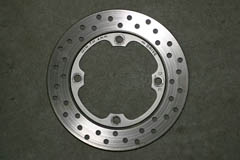
Stock Rear Brake Rotor Weight...............1.76 lbs (0.80 Kg)
Modified Rear Brake Rotor Weight..........1.28 lbs (0.58 Kg)
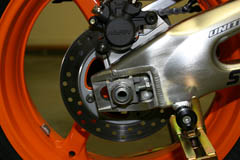
You'll need to remove the rear wheel from the bike in order to get the rotor off. Removing the rear wheel is fairly easy, especially if you have a second set of hands to help out. Start by loosening the 12mm lock nuts and drive chain adjusting bolts on each side of the swing arm. Next loosen the 32mm rear axle nut. Use a rear stand to support the rear wheel off the ground and remove the axle nut, washer, and drive chain adjusting plate. Push the rear wheel all the way forward giving as much slack in the chain as possible. Derail the drive chain from the sprocket and remove the rear axle by pulling it out the left side. The rear brake caliper sets in a slot and is supported by the rear axle. The caliper is not bolted to the bike so be careful that it does not fall from its bracket and scratch up your wheel when you pull the rear axle out. Once the axle is out, you can maneuver the rear wheel out the rear of the swing arm. With the rear wheel removed, simply remove the four 5mm hex bolts that hold the brake rotor to the wheel and send it off to Tom.
|
|
|
Once you have your modified rotor returned, just bolt it back to the wheel and torque the four 5mm hex bolts to 31 ft/lbs (42 Nm). Put a dab of blue Locktite on the bolts prior to installing them. The manual states to use new bolts for the rear rotor, but I re-used my originals as they looked fine. Put a light coat of high quality grease on the rear axle, and remount the rear wheel to the bike, again being careful that the rear caliper doesn't scratch your wheel. Install the chain adjusting plate and washer. Adjust the drive chain slack to between 1 inch to 1 3/8 inch (25mm - 35mm) at the mid point of the chain per the manual and tighten the 12mm lock nuts. Tighten the rear axle nut to 83 ft/lbs (113 Nm) and recheck the drive chain slack.
|
|
|
 |
If you'd like details on having this modification performed to your rear rotor contact Tom Wertman and I'm sure he'll help you out.
This page is part of a frame set. If you reached this page via a search engine please click here to go to the main page.