Honda CBR 1000RR Sub Frame Painting
May 2005
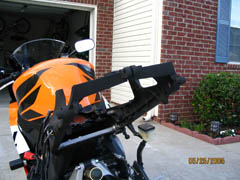
I've seen a lot of 1000RRs running with aftermarket exhausts with the heat shields removed. I like the idea of losing the heat shields as I don't think they're necessary with the cooler running titanium or carbon cans, but I don't like seeing the sub frame winking at me from under the tail section. This sub frame, or "seat rail" as Honda calls it in the manual, becomes highly visible once the heat shields have been removed. I decided I would paint the sub frame on my 1000RR black to hide it. Honda should have completed this from the factory, and it seems pretty chintzy to me that they failed to do so as Honda only painted the front half, but I digress.
There are a lot of parts that need to be removed in order to paint the sub frame, but it is very easy to remove them and not really all that time consuming. I'd say a hour tops. Just be sure to keep track of where the bolts go. I put them back in the holes after removing the parts, just be careful not to paint them by mistake. I've also heard of people pushing the bolts through a piece of cardboard and labeling them. You will need a set of allen wrenches and various sockets as well as screw drivers. I typically list the parts and bolts that need to be removed in my articles, but in this case there are just too many and I'm sure I'd forget one somewhere, so I'll let the pictures speak for themselves. If you need more detail, I suggest grabbing a manual.
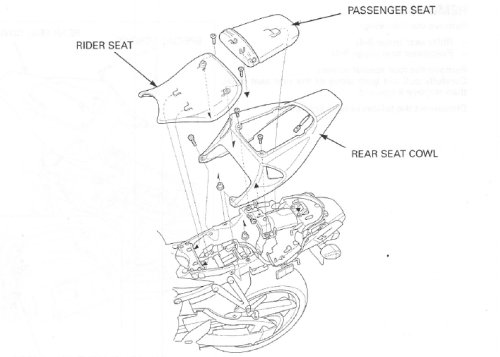
Begin by removing the driver's seat, passenger's seat, and rear tail section. This is pretty straight forward, but be advised you'll have to bend the tail section out quite a bit to get it to clear the under tray. Don't be concerned as that's how it's designed.
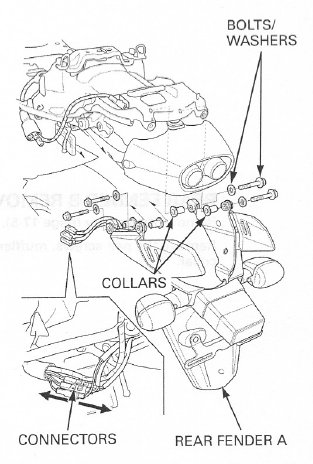
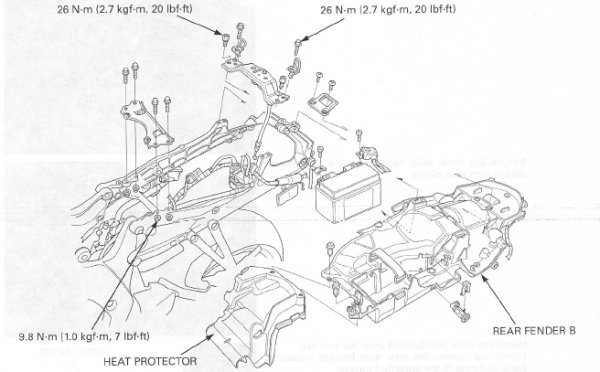
Next remove the rear fender assembly as well as the passenger foot pegs. When reinstalling the passenger foot pegs torque the foot peg bracket bolts to 20 ft. lbs (26 Nm).
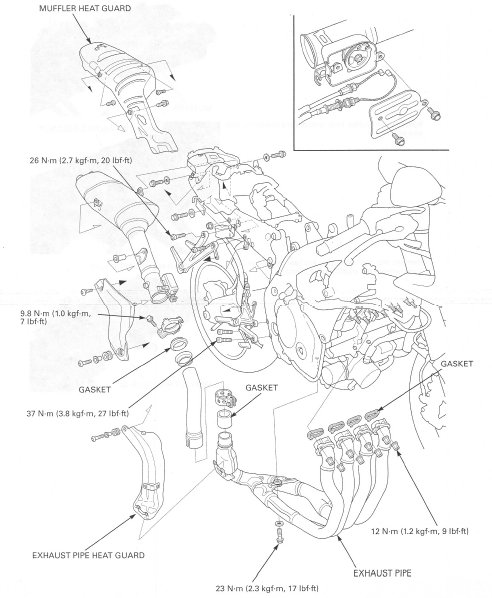
Remove the exhaust end can, heat shields if you still have them, and battery. Unplug the relay box from the battery tray and unhook the wiring from the battery tray. Remember when removing the stock exhaust to disconnect the exhaust valve cables.
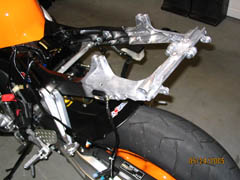
Finally, remove the battery tray, or as Honda calls it "rear fender b". You'll need to remove the rider seat bracket as well as the rear seat lock mechanism to remove this tray. The only thing to be aware of are the two small plastic phillips screws that attach the battery tray to what Honda calls the "heat protector" in the picture below.
I went ahead and removed all the rubber grommets, screws, and bolts from the sub frame as well. I did not want to get paint on anything but the sub frame. I also removed the two bolts at the rear of the sub frame. I contemplated painting them, but as soon as you put a wrench to them the paint will likely scrape off, so I decided not to paint those. Also, remove the rear reflectors if you still have those on your bike. Double check everything to make sure nothing is left on the sub frame except those pieces you want painted.
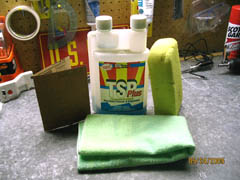
When painting, prep work is everything so be sure to complete these steps thoroughly or you increase your chances of having problems later on. Begin by sanding the unpainted area of the sub frame with 220 grit sand paper. You don't have to go nuts with sanding, but knock the shine off the metal and be thorough. Mine looked good and scratched up when I was done. Once it's sanded, blow off any sanding dust with compressed air and wash the sub frame with TSP. TSP stands for trisodium phosphate and is a heavy duty cleaner/degreaser concentrate that you mix with water. It is available at any home improvement shop that sells paint and comes in liquid or powder form.
|
|
|
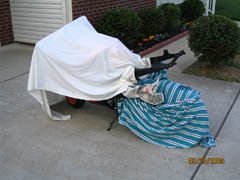
Once you've washed the sub frame with TSP, rinse it with fresh water and let it dry. Once dry, mask off the other areas of the bike with old sheets, towels, newspaper, and masking tape to avoid getting any over spray on your body work or other bike parts. You'll have best results if you paint on a less windy day.
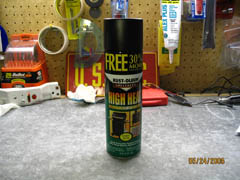
I chose high temp grill spray paint that I picked up from a local hardware store to paint the sub frame. It is good to 1200 degrees F (649 C), is satin flat black, and very durable. It nearly matches Honda's finish used on the front half of the sub frame. The directions on the can read that they DO NOT recommend a primer. I presume this is due to the heat rating. I was skeptical about this paint sticking to the bare metal sub frame, so I tested a small spot and it stuck like glue. I presume this paint has a type of primer agent built in but you still want to be sure you do a good job when sanding just to be sure you have no problems of peeling paint later on.
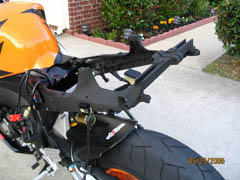
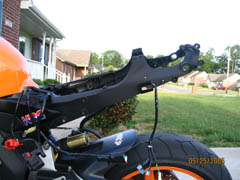
Next, simply spray few coats of the high temp grill paint on the unpainted areas of the sub frame. There's no special instructions, just follow what the can recommends, which in my case was to hold the nozzle about 8 inches (20cm) from the surface to be painted, and spray in even sweeping motions slightly over lapping. I sprayed 3 coats of paint on the sub frame about 5 minutes apart. Once you're done, double check to make sure you didn't miss any spots. The underside is contoured and a little tricky to get evenly covered, so check it thoroughly.
|
|
|
|
That's all there is to it. Just bolt everything back on the bike paying attention to torque values and you're all set. Now all that winks out the back end of the bike is the end can.
This page is part of a frame set. If you reached this page via a search engine please click here to go to the main page.