 |
 |
Honda CBR 1000RR VFX LED Running Light Kit
March 2005
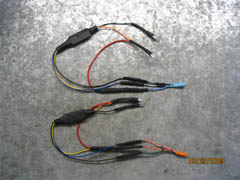
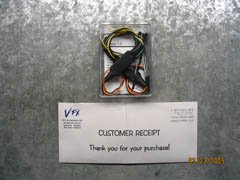
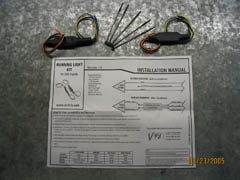
After installing the Mototeck flush mount turn signals, I wanted to enable them to operate as running lights as well as turn signals, just as the stock Honda turn signals do. The units sent by Mototeck to accomplish the running light feature will not work with the Honda CBR 1000RR. I contacted www.vfxkits.com and spoke to the helpful staff about my problem. VFX recommended the VFX LED Running Light Kit. I placed my order and received the parts quickly, well packaged, and complete. The kit includes 2 small running light units, instructions, and zip ties to tidy up the wiring. The running light units are of a digital design and are very precise on the turn signal control. VFX Sales even took the time to include an envelope thanking me for my purchase which contained my receipt. A nice touch as most online retailers just stuff the receipt in the box. The instructions are well laid out with diagrams and are very easy to follow.
|
|
|
I began preliminary wiring and I always test everything before doing the final connections. While testing I noticed that the running lights worked, but the turn signals did not. I double checked all of my connections and made sure I had followed the VFX wiring instructions properly, and I had. My theory was that the VFX circuit relied on a constant +12V source on the running light wire. For some reason Honda kills power to the running light wire when the turn signals are activated and I had checked this with a volt meter. I called VFX to confirm that their unit needed this constant +12V on the running light wire and VFX did confirm this. I explained the issue to VFX, and they said they would do some checking and get back to me.
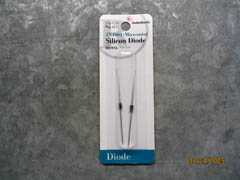
VFX attempted to contact Honda to ask the engineers about the +12V on the running light wire. VFX was unable to speak to anyone at Honda that could assist them. VFX then sent a representative to a local Honda dealership and tested on a Honda CBR600RR to come up with a solution. VFX sent me updated instructions the same day, and let me know what part I needed to solve the problem. They also informed me that they would send me the parts I needed free of charge and would provide them to any Honda owner that had ordered their kit. They also began updating their instructions to include the new information in regards to Honda motorcycles and provide the necessary parts free of charge, upon request, to Honda owners who purchase the kits. The fix is a simple 1N4001 50V 1A diode. These can be obtained from Radio Shack (P/N 276-1101) and a package of two costs a mere .70 cents, so I just picked up a pair to complete the project.
I was already impressed with VFX customer service during my order process, but this was outstanding service. I notified them of an issue, and they had a fix to me the same day that was both cheap and easy. They were also great about communicating with me on the issue as well and got back to me within two hours of my initial call. I can count on one hand the number of times I've had this level of service from ANY vendor. I highly recommend VFX for their engineering prowess as well as their customer service.
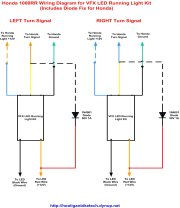
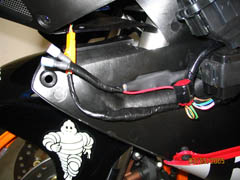
Once I had the fix in place, I began making the final wiring connections. I cut the connectors off my stock turn signals to re-use them in connecting up the VFX unit as well as the Mototeck LED flush mounts. This is the cleanest and easiest way to install everything. It also helps prevent hacking up the bike's wiring in the event you ever want to go back to stock trim. As always, I recommend using water proof heat shrink connectors and plenty of heat shrink tubing. This keeps things bullet proof. The wiring isn't very complicated, and the diagram below shows how things should be connected. I used insulated disconnect terminals at the flush mount connections so that I could remove the flush mounts in the event it was necessary. If you use permanent butt connectors for the flush mount connections, you will not be able to remove the flush mounts from the bike unless you cut the wires. The insulated disconnect terminals allow the flush mounts to be unplugged from the VFX kit. For added weatherproofing I also put a dab of dielectric grease in the disconnect terminals.
WIRING:
RIGHT SIDE
BLUE
wire from VFX unit to bike's
LIGHT BLUE with
WHITE STRIPE
wire
*YELLOW
wire from VFX unit to bike's
LIGHT BLUE wire (diode connection here)
BLACK
wire from VFX unit to bike's
GREEN wire
*ORANGE
wire from VFX unit to flush mount's
RED wire (diode connection here)
BLACK
wire from VFX unit to flush mount's
BLACK wire
LEFT SIDE:
BLUE wire from
VFX unit to bike's
ORANGE with
WHITE STRIPE
wire
*YELLOW
wire from VFX unit to bike's
ORANGE
wire (diode connection here)
BLACK
wire from VFX unit to bike's
GREEN wire
*ORANGE
wire from VFX unit to flush mount's
RED wire (diode connection here)
BLACK
wire from VFX unit to flush mount's
BLACK wire
*(make sure the diode is pointing toward the
orange
wire on the VFX unit)
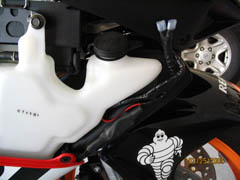
Once I had everything connected, I put small pieces of heavy duty velcro on the back of the VFX units and put the other side of the velcro on the plastic of the 1000RR. This will keep the VFX units firmly mounted to the bike to alleviate any noise and or unnecessary movement. The entire length of the VFX units including wiring is about 20 inches (60cm), so use the included zip ties to tidy them up. I also taped up all the wiring with electrical tape to give it a stock look. I'm very happy with the performance, customer service, and engineering of the VFX running light kits and will use them again on future motorcycles I may own.
 |
 |
This page is part of a frame set. If you reached this page via a search engine please click here to go to the main page.