Track Day Preparation
May 2008
I recently attended my first track day, and there is some preparation involved in getting you and your bike ready. Since there is a lot of question about this on the forums, I thought I'd detail what I did to get ready.
For starters, the bike needs to be in top running condition. Make sure your oil is good, brakes are good, chain is properly adjusted, and tires are at least 75% new. You'll also need to change out your radiator fluid to something track approved. A lot of people use just plain water with an additive called Water Wetter mixed in. This additive is relatively in-expensive, protects and lubricates the water pump, and is supposed to aid in cooling efficiency by raising the surface tension of the water. Water by itself is the best coolant, but you need an additive to protect the water pump so this is a good route to take. The down side to this water and Water Wetter cocktail is that it is not freeze resistant at all. That means if you live in an area that gets below freezing in the winter, you'll need to put glycol or some other type cold temperature safe mix back into the bike. Be sure to use ONLY distilled water as it won't corrode the radiator or form mineral deposits.
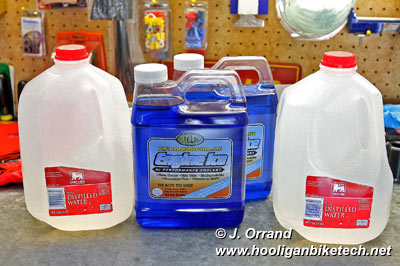
I personally used a product called Engine Ice when I changed out my coolant. It is approved by a lot of track day organizations, comes pre-mixed so you don't add any water, and IS winter safe protecting to -27 degrees. It is also supposed to aid in cooling efficiency as well, and while I didn't really notice much difference, it may have taken a little while longer for my bike to reach 221 degrees F when sitting in traffic where the fan kicks on, but I did not time it before and after so I can't say for sure. This product is more expensive than Water Wetter, but it's winter safe, so once you put it in you can forget about it. Whichever route you take, but sure to flush the stock coolant from the system with distilled water until it runs clear.
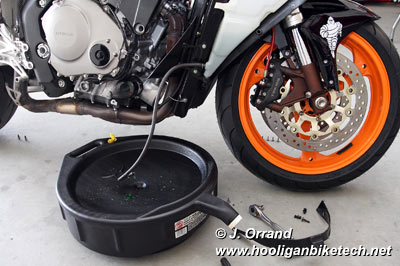
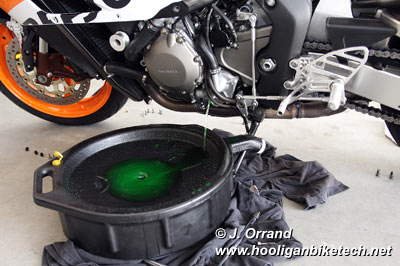
Changing the coolant is an easy process that takes about 45 minutes, reference pages 7-6 and 7-7 of the factory service manual if you have it. Remove the right upper and lower, and the left lower body panels and set them somewhere safe so they don't get stepped on. Drain the coolant over flow tank, rinse with distilled water, and drain again. With the bike on it's side stand, remove the 10mm nut in the center of the water pump on the left side of the bike being sure a large container is place under this bolt to catch the coolant that will pour out. The drain hole will only trickle fluid at first, so once you have the bolt removed and a pan in good position, remove the cap from the radiator to allow fluid to pour at a much faster rate. Once it's drained, put the drain bolt back in, fill the radiator with distilled water, run the bike up to operating temp, and repeat the drain process. Repeat this fill and drain process until the fluid coming from the drain plug is clear. Once that final flush has drained, put the drain plug back in, replacing the sealing washer if needed, and torque to 9 ft/lbs. Refill with your choice of coolant, and fill the over flow bottle back to the point it was stock with the same coolant mix you used to fill the radiator.
Fire the bike and let it idle with the radiator cap
off, blipping the throttle until you don't see any more air bubbles at the
radiator cap neck. Top off the radiator and cap it. Make sure the
over flow bottle drain hose is secured and reinstall your body panels.
Now's a good time to unplug those front turn signals as well. The 2004 -
2005 CBR1000RR takes 3.33 quarts (3.15 liters) of coolant to refill, and it took me about two
flushes for the fluid to run clear. I used 1.5 gallons of distilled water
for the flush and 1.5 containers of Engine Ice for the refill. Engine Ice
is PRE MIXED so DO NOT dilute it. Just pour it in the bike as is.
|
|
|
Next, you'll want to tape up the lights, turn signals, remove the mirrors, passenger foot pegs, and license plate. At the event I attended they also asked us to tape up our wheel weights. Most track day organizations will have a list of bike requirements so be sure to get a copy of that and follow it to a "T". Don't be the clown that shows up with half the requirements completed, as safety is taken VERY seriously.
Start prepping the bike a couple of days before the event so you're not rushed. I found 2" blue painter's tape the perfect size to tape up lights, and a dull piece of plastic worked well to trim off excess, making for a clean looking bike. You'll want to unplug the lights as well so they don't cook the tape making it hard to remove. This combination of blue painter's tape and unplugging the lights will make for easy removal when you get back home.
I'd also recommend putting a small piece of tape over your speedometer so you're not tempted to look at it while out on the track. I hesitated to do this, but once I got out there I was glad I did. If you do tape over the speedo, be sure not to cover up anything but the speedo, leave the engine temp, shift light, tach, and other info visible. With the mirrors removed, you'll need something to secure the fairing to the fairing stay. I recommend mirror block off plates, but I've seen people use zip ties as well. I picked up some carbon fiber block off plates from CarbonPartz.net and they were a good buy and very well made.

Set your suspension up for the track, particularly the sag if you've never done so. It's relatively easy to do and will help you have an easier time riding the motorcycle. Most suspension gurus recommend 38mm of sag for the front, and 25mm of sag for the rear. Read up on suspension so you understand as much as possible before your track day, and familiarize yourself with where adjustments are made on your bike. The worst thing you can think is that it's set right from the factory. In my case, I had to set the front preload to full hard and still couldn't get to 38mm of sag and I only weigh 172 lbs, but I got it closer than it was with stock settings and it made a difference in handling and stability. The track representatives also recommended 30 psi of tire pressure for both front and rear on my Michelin Pilot Powers and that seemed to work pretty well for me so find out what's recommended for your tires.
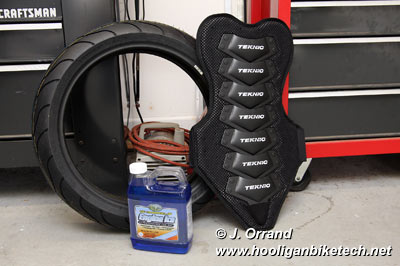
Finally, you'll want to prepare yourself. I recommend a back protector even if the class you ride in doesn't require it. I picked up a Technic based on the recommendation of www.superbikesupply.com and was very happy with it. Of course you're going to need good boots that cover the ankles, gloves, a DOT or even better SNELL approved helmet, and leathers in either a one piece suit, what I'd recommend, or a two piece that zips 3/4 of the way around at the waist, and ear plugs. You'll also want to get a good night's sleep the night before, and don't go out and drink too much. You're going to need all your energy and concentration on the track. It also wouldn't hurt to hit the gym or do some exercises around the house a few weeks before hand. Riding on the track is more of a workout than you might think.
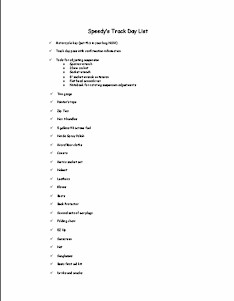
Be SURE to take your bike key. I've heard of folks forgetting that and it's obviously critical. You'll also want to take some basic tools for your bike, especially those used to adjust the suspension. I'd also recommend a note pad to make notes of things you change or to get phone numbers and e-mail addresses for new friends you make. A basic first aid kit isn't a bad idea either, along with plenty of water and snacks, even if the event organizer says there'll be plenty. Better safe than sorry and you dehydrate much faster track riding. A camera is a good idea as well so you can show off your pics to your friends. Below is the list I used to make sure I didn't forget anything. It's in PDF format, so you'll need Adobe Reader to view it.
![]()
-Speedy
This page is part of a frame set. If you reached this page via a search engine please click here to go to the main page.