Custom Grille (Satoshi)
This modification was originally thought up by a gentleman named Satoshi from Japan. Many people copied his work using many different methods. This is my implementation which I feel is bullet proof as well as modular allowing simple removal for maintenance. This is a time consuming project that requires some patience.
For this modification you'll need:
1996 -
1998 4Runner Grille
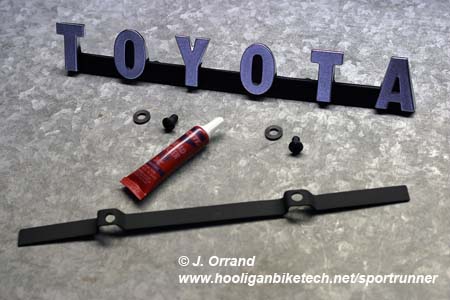
1969 - 1973 Toyota FJ40 Grille Emblem
1/4"
Expanded Aluminum Sheet (at least 18" x 36")
1/2" aluminum flat stock (at least 12" long)
2 Heavy Duty Zip Ties
Small
saw
Plenty of Sandpaper (80, 220, 400, and 800 grits)
Prep-All (thinner)
Fiber Glass kit
Bondo Kit
Cheap 1" Natural Bristle Paint Brush
Chemical Resistant Gloves
Plastic Putty Knives
Paint Stirs
(8) #10 x 1/2 Phillips Screws
(2) #10 x 3/4 Phillips Screws
(10) #10 Stainless Steel Lock Nuts
(10) Stainless Steel Washers
(12) Nylon Washers
(2) Metric hex bolts to fit the Toyota Emblem
Duplicolor Hot Rod Black Sandable Primer (P/N DAP 1698)
Duplicolor Etching Primer (P/N DAP 1690)
Duplicolor Semi Gloss Black Acrylic Enamel (P/N DA 1603)
Rustoleum High Heat Bar-B-Q Flat Black
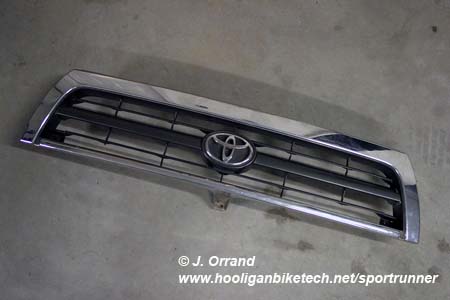
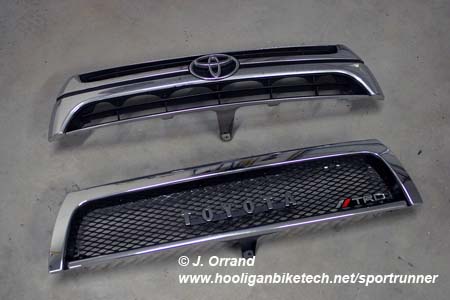
This modification in it's current form will only work with 1996 to 1998 grille inserts. 1996 - 1998 grille inserts will fit all 3rd generation 4Runner (1996 - 2002), however if you own a 1999 or newer 3rd generation 4Runner you'll have to acquire the proper grille insert to use for this modification. I found mine on Ebay VERY cheap and it worked out great.
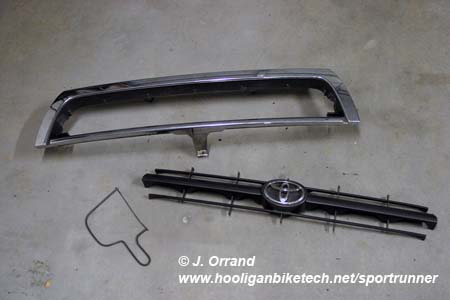
You'll start with the 1996-1998 grille insert and cut out the center section using a fine tooth saw.
|
|
|
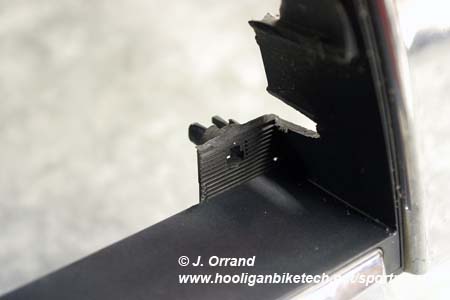
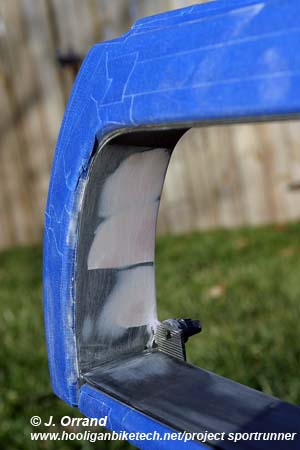
Take care around the lower corner mounting points. You'll need to retain some of this area for re-mounting the grille. You'll also want to use a sanding block to sand off any remaining tabs from the sawing you did earlier. Use 220 grit sand paper for this and it'll go pretty quickly. You'll also want to lightly sand the inner grille area as the preliminary prep for painting.
|
|
|
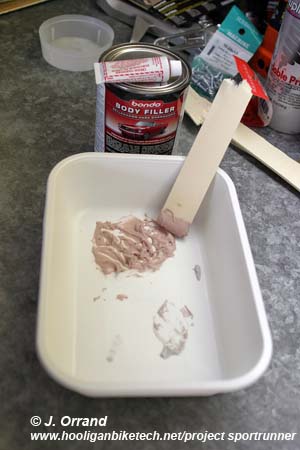
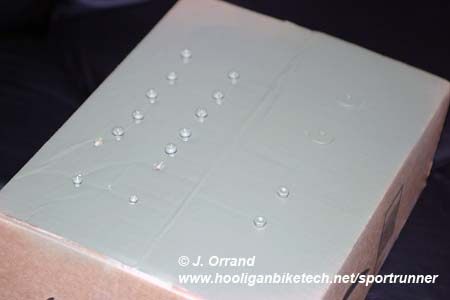
Tape up the chrome parts of the grille using a good layer of painter's tape. Mix up a small amount of fiber glass resin and apply fiberglass to the cut out edges of the grille insert. BE SURE to work in a very well ventilated area as this stuff is extremely toxic. If you really want to be safe wear a respirator as this will literally make you ill quickly if you breathe the fumes. You'll have to work quickly with the fiberglass. It's hard to describe how to use the stuff, so just go for it. This was my first experience with fiberglass and it came out perfect. Just work quickly as it sets up pretty fast. Wear some of the latex gloves as well as you don't want the resin touching your skin and don't fool with the fiberglass sheet too much once you've laid it down as it'll just turn into a big mess.
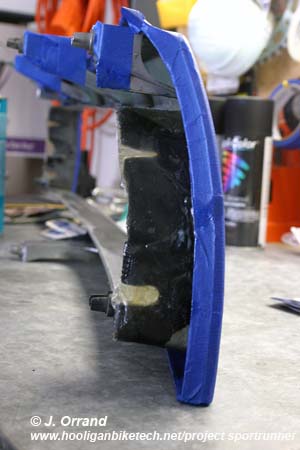
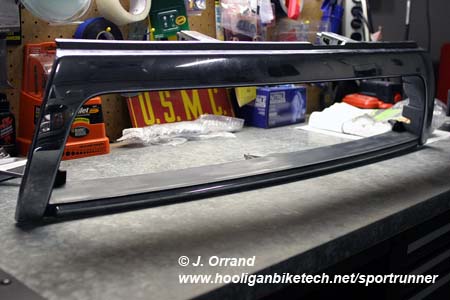
Once the fiberglass has dried thoroughly, use some 180 grit sand paper to smooth down the edges, followed by some 220 grit. Then mix up a golf ball size portion of the Bondo according to the can's instructions and spread it into the low spots that the fiberglass covers. Be sure to build it up just a hair higher than the rest of the grille edge to give you some room to sand it down. Again work quickly as you'll only have about 5 minutes to work with the stuff before it hardens. Once dry, sand it down with 180 grit sand paper, followed by 220. If you're satisfied at this point, you can move on to priming. I wanted it perfect so I went one step further and used some Bondo spot putty to fill any tiny spots left behind after sanding and finished by sanding the entire inner grille area with 400 and 800 wet dry sandpaper. Be sure you're happy with the finish as this part is critical before painting. Once you're happy wipe the grille down with paint prep and don't touch it again with your bare hands.
|
|
|
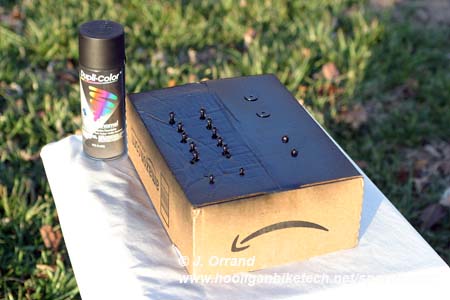
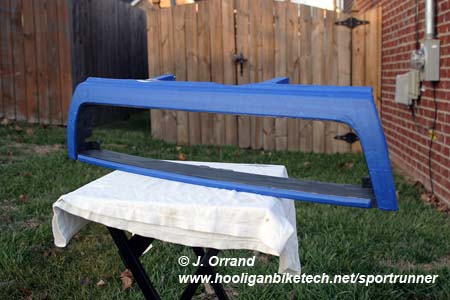
Prime the grille insert and paint according to your paint's instructions. I used Duplicolor hot rod primer (P/N DAP 1698) as it was black like the top coat would be to make for easier coverage, and followed up with Duplicolor acrylic enamel semi gloss black paint (P/N DA 1603). This has been a VERY durable combination and the finish is flawless. I used 2 coats of primer followed by 3 coats of paint.
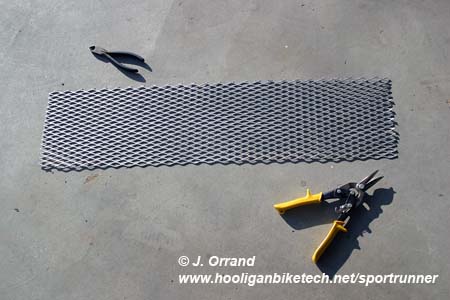
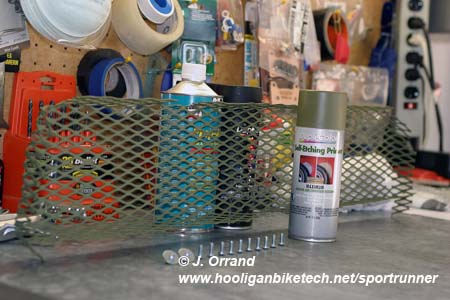
For the mesh I used some 1/4" expanded aluminum that I picked up from a local machine shop. It's light weight, corrosion resistant, and easy to work with. I tediously shaped it to the grille and cut out areas where the tabs needed to go through. Let the mesh overlap the grille 1.5 - 2 inches to give you room for your mounting hardware. I found using a 1" x 1" x 12" wood piece and a hammer helped with shaping the mesh. This is a very tedious step so start fresh to make sure you have plenty of patience. Once finished, I cleaned the mesh piece with soap and water, then with paint prep. To paint aluminum you have to use a special etching primer in order for paint to stick. I used Duplicolor Etching Primer (P/N DAP 1690). I also scuffed up the bolts and washers I intended to use to mount the mesh to the grille and primed them with etching primer as well.
|
|
|
|
|
|
Once the etching primer had dried, I sprayed the mounting hardware and mesh with the Duplicolor semi gloss black. Again I used 2 coats of primer and 3 coats of paint.
|
|
|
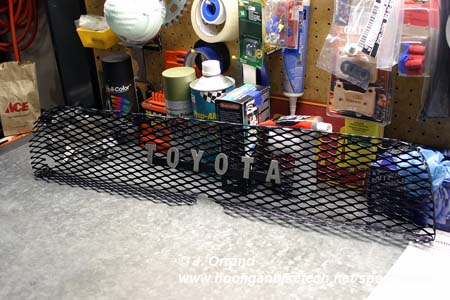
I then fabbed up a mounting bracket for the FJ40 emblem. I used some 1/2" aluminum flat stock and used the emblem as a guide to make the appropriate holes for the mounting bolts and necessary bends. I just put the flat stock in a vice to shape it. I then sanded it with some 220 grit paper, and painted it with Bar-B-Q flat black. Bar-B-Q grill paint does not require a primer. Mount the emblem using the metric hex bolts and 2 black plastic or nylon washers.
|
|
|
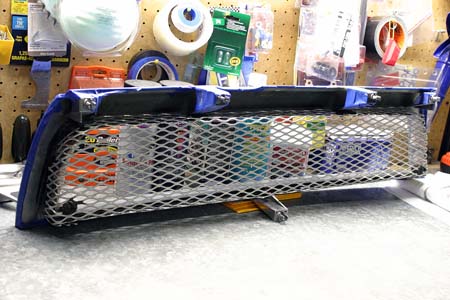
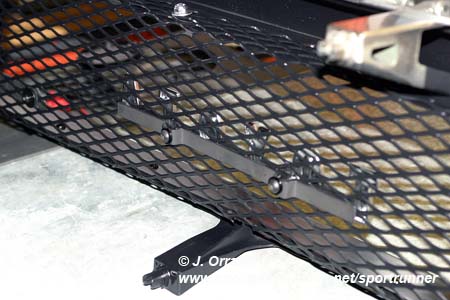
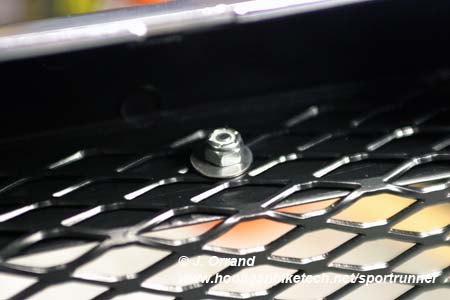
Finally, just mount the mesh to the grille. Just lay the mesh on the grill and mark locations to drill the mounting holes. Try to make them as evenly spaced as possible. Once your holes are drilled, mount the painted expanded aluminum to the grille using the #10 philips screws, stainless lock nuts, and washers. I used 4 along the top and bottom and 1 on each side.
|
|
|
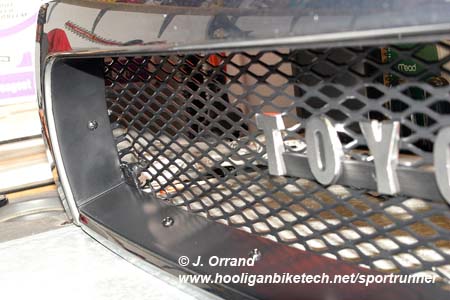
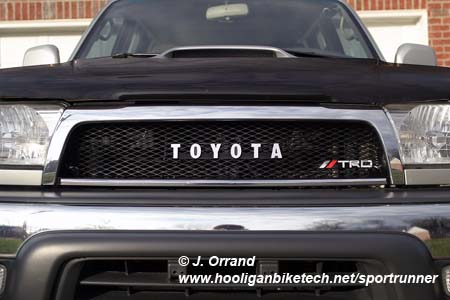
Then just put the grill back on the vehicle. I added a small stick on TRD logo to mine for a little something extra.
|
|
|
This design is pretty much as bullet proof as I could make it. I think it looks great and it should last the life of the vehicle. Check Ebay for the grille and FJ emblem to save a few bucks over going to the dealer.