|
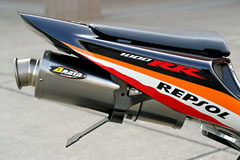
Honda CBR 1000RR Jardine Fender Eliminator July 2005 The tail of the 1000RR looks pretty bulky as it comes stock from Honda. I searched around looking for a nice fender eliminator that would tidy up the tail area, be simple to install, and was durable. I looked at fabricating my own, but in order to get what I wanted it was cheaper to purchase a pre-made unit. I researched several models and found the Jardine Fender Eliminator fit the bill. I feel the Jardine Fender Eliminator is a little over priced for what it is, but aren't most of the parts we buy for these bikes?
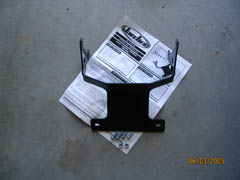
The installation is simple enough and the instructions are complete. The unit consists of the eliminator, mounting hardware, and an instruction sheet. You'll need to remove the rider seat (2 x 5mm button head hex bolts), passenger seat, and tail section (4 x 5mm button head hex bolts). You'll then need to remove the stock mud guard assembly and turn signals and unplug the stock license plate light. Once you have these items removed, simply bolt up the Jardine Fender Eliminator using the supplied hardware which consists of 4 bolts and two nuts. The fender eliminator bolts to stock mounting locations on the subframe as you can see in the image below.
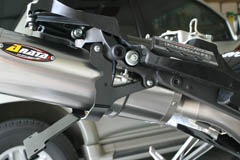
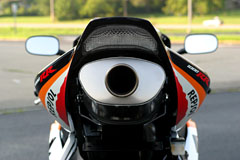
For US plates you'll mount the bottom holes of the plate into the bottom holes on the fender eliminator so the top of the plate is tucked up close to the exhaust. I've seen a couple of people improperly mount the plate using the plate's top holes and this puts the plate below the fender eliminator which is incorrect. The only down side to this unit is there is no light included with the kit to illuminate the license plate. At the price of this unit that SHOULD have been included. I have not been running a plate light and have not had any issues from local law enforcement, however if you do a lot of night time riding, you may want to invest in some LED Bolts or some similar form of illumination for the plate to remain legal. I did have to modify the fender eliminator slightly to make it fit with my Arata slip on, but that's simple enough and only takes about 5 minutes with a dremel tool. The modification consists of trimming a small amount of material from the mounting area to allow it to clear the Arata bracket. You can see this in the above picture. Stock turn signals can bolt to this unit if you don't have to modify it to fit with a pipe such as the Arata. This unit weighs in at 0.54 lbs which is a significant weight savings over the stock mud guard which weighs a hefty 2.24 lbs.
This page is part of a frame set. If you reached this page via a search engine please click here to go to the main page. |